

Showing posts with label photography. Show all posts
Showing posts with label photography. Show all posts
Sunday, August 2, 2015
Wednesday, June 10, 2015
#SummerCreative Easy iPhone Photography
I'll be the first to say that I am addicted to taking pictures, ask my family. One simple hike will turn into a slow pace and eventually an abrupt halt. I travel light with just an iPhone and a tiny bag carrying my ōllo Clip. I wrote an entire blog post about my lens and will include the link below. These images were captured with a 10x Macro.


TCV Episode #SummerCreative
Please Subscribe
Add your email <3
the Creative Boost YouTube Channel
the Creative Boost Facebook Page
Zumba with Ho'o & Paish
Techie Info
Subject: Point Defiance, Tacoma
Subject: ōllo Clip blog post
Annotations App: A+ Signature
Phone Accessory ollo Clip
Camera: iPad & iPhone
Tuesday, March 17, 2015
DIY - Stock Photos
I like using my own pictures and if you're reading this you probably do to because copyright issues is a drag. Who wants the hassle? If you're new to creating stock photos or like your mobile camera this is a great place to start.

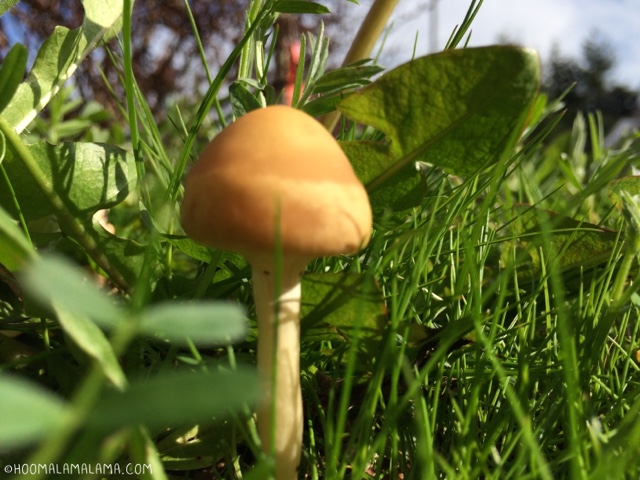
Opportunity - There's always a photo opp but it might not be where you expect it. Look down and think, "Honey I shrunk the kids." [Remember that movie & the mushroom scene?] I used A+ Signature drawing feature to doodle a dude chilling under the shade.

Start a Collection - Take several shots in the same light. You can choose different subjects but keep the lighting consistent. [I usually don't mark my pics until I'm ready to use them.] If you have iPhone it will categorize your photos.
Offset - Your subject in case you might want to add text to it later.

Opportunity - There's always a photo opp but it might not be where you expect it. Look down and think, "Honey I shrunk the kids." [Remember that movie & the mushroom scene?] I used A+ Signature drawing feature to doodle a dude chilling under the shade.
Start a Collection - Take several shots in the same light. You can choose different subjects but keep the lighting consistent. [I usually don't mark my pics until I'm ready to use them.] If you have iPhone it will categorize your photos.
Offset - Your subject in case you might want to add text to it later.
Build - Your stock photos and create themes that you can use in the future. For example Christmas comes every year and what you capture can be used next year. [Tip: Keep 3 to 5 pics in each session. Sometimes less is more.]
Please Subscribe
the Creative Boost Blog
the Creative Boost YouTube Channel
the Creative Boost Facebook Page
Techie Info
Subject Random Mushroom
Camera iPhone5s
App A+ Signature
Friday, March 13, 2015
DIY - Foodie pics and delicious fonts!

On most iPhones you can add the grid feature to help you line up your pictures but my favorite attribute is the touch screen lighting. [Check in settings under Photos & Camera to add the grid.] My suggestion...
1. Go close to your subject and be mindful of the background.
2. Take several shots moving in and out.
3. Try several angles because it will capture the light differently.
4. Lighting - it's best when the light is toward your subject casting the shadow behind it.
5. I like to get my lens eye-level with food as if I was going to eat it up.
TIP: Imagine that your lens is the spoon. I don't know why but that helps me.
I used A+ Signature app to add thought to the picture. If you choose to bend your words around the subject be forewarned. The more curves the longer it will take. [Why?] Because you will have to do a separate text for each word or letter.


After all that work I decided not to add the graphics [heart] and kept it really simple. At the end of the day you should want to eat the picture. PEACE be the Journey ~ Ho'o
Please Subscribe
the Creative Boost Blog
the Creative Boost YouTube Channel
the Creative Boost Facebook Page
Techie Info
Subject Trophy Cupcake's D.C.P.B.
Camera iPhone5s
App A+ Signature
Friday, March 6, 2015
You can do MORE with your iPhone + ōlloClip
A recent trip to the Museum of Flight was out of this world! [Sorry for the pun.] All I had was...
1. My iPhone 5S
2. One ōlloClip
3. Used the WideAngle side of the lens
4. Watermarked my pics in A+Signature
I didn't use flash and here's the result during sunset with low light. It turned out to be a great memory for the children, na keiki, and educational for all of us. Time flies by and after two hours we were HUNGRY!

 It was kind of hilarious watching everyone chugg huge camera bags and lift these giant lenses into the sky. Most of them were trying to capture family memories so my advice is keep it simple & light. Especially around little ones.


I follow a few simple, non-professional, guidelines that you can adapt and use.
1st Pick one dominate subject, even when taking group photos, and use that as your focal point.
2nd Touch the screen on your subject. Snap if you like the lighting. [Take the pic]
3rd If the lighting is too dark then reset the auto focus by moving your lens away and then back.
4th Don't be afraid of empty space, negative lighting, having your main subject on the side or corner. [The pic with a model of the Explorer is an example of my subject being off to the side. Your eyes should look at the Spaceship Explorer and then drift away.]
Have fun & catch me on FB - PEACE be the Journey, Ho'o
Subscribe to:
Posts (Atom)